Photograph Your Cards So the AI Grades Them Right

Our AI pre-grade, PJG AI Vision, grades your card straight from the photos you upload. It measures centering, corners, edges, and surface — and it reads both the front and the back. In other words, the photo is the input. A clean, honest shot gives you an estimate you can rely on; a blurry, glare-covered one can hide a mint card's quality or make a small flaw look worse than it is. So before you spend the $1 on an AI pre-grade, take two minutes to shoot the card properly.
Here's how to give the AI the clearest possible look.
Light it evenly — kill the glare
Bright, even, diffuse light is your best friend. A big soft source — daylight from a window (not direct sun), or a lamp bounced off a white wall or ceiling — wraps around the card without hot spots. Avoid a single harsh bulb or your phone's flash: they bounce straight back off holo and gloss, creating a white glare that swallows the surface detail the AI needs to judge scratches and print lines. If you see a shiny hotspot in the preview, move the light (or the card) until it's gone. Tilting the card a few degrees and watching where the shine travels is a quick way to find the angle with the least reflection — then shoot from directly above once the glare is off the important areas.
Shoot straight-on — no tilt
Hold the phone directly above and parallel to the card, so the lens looks at it dead-on. Tilting introduces "keystone" distortion — the card looks wider at one end — which throws off centering measurements and makes corners look uneven. A simple trick: rest the card flat on a table and lower the phone straight down over it, keeping the whole border evenly spaced in the frame.
Use a plain, dark background
Lay the card on a plain, uncluttered, dark surface — a matte black or deep grey mat is ideal. A busy background (a patterned desk, a keyboard, other cards) makes it harder for the AI to find the true edges of your card, and light-coloured surfaces can trick the exposure. Plain and dark equals clean edges equals a more accurate read.
Fill the frame and lock focus
Get close enough that the card fills most of the frame, but leave a little margin so no edge is cut off. Then tap the card on your screen to lock focus, and hold steady until the shutter fires. Sharp beats zoomed-in: a crisp photo from a sensible distance reads far better than a soft, over-cropped close-up.
Capture both sides
The AI grades the front and the back, so photograph both — each with the same care. Backs matter: off-centre borders, edge wear, and print defects on the reverse all affect the grade, and centering is judged on both faces. It's easy to shoot a perfect front and then rush the back — resist that. One good front shot and one good back shot, both evenly lit and in focus, give the AI the complete picture it needs to score fairly.
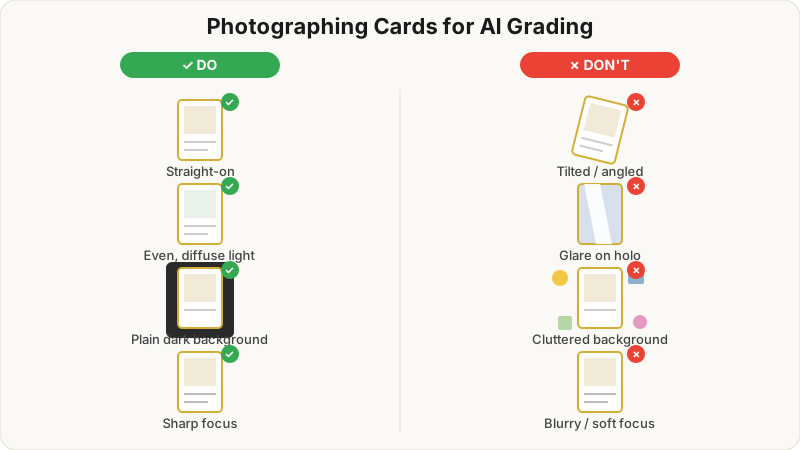
Quick recap
- ✅ Even, diffuse light — no flash, no glare
- ✅ Straight-on, phone parallel to the card
- ✅ Plain, dark background
- ✅ Card fills the frame, edges visible, focus locked
- ✅ Both front and back
- ❌ Tilt, glare, clutter, blur, cut-off edges
Nail these and your $1 AI pre-grade earns its keep — you'll get a sub-grade breakdown for centering, corners, edges, and surface that actually reflects the card in your hand. Want to sanity-check your framing first? Our free centering tool lets you eyeball your borders before you upload.
Ready when you are — start an AI pre-grade and see what your card really scores.